Complete
Renovation
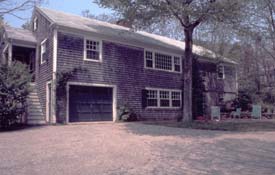
Exterior |
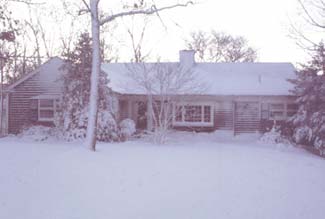
Circa 1975 |
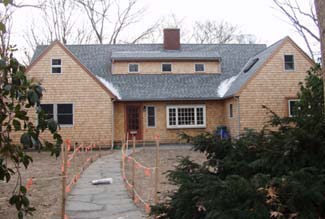
After Renovation |
| Built
in the 1950's as a summer home, this house featured a dark
kitchen, small dining room and living room and two bedrooms
with a full basement including a one car garage. In the '70's
new owners finished the basement to include a small in-law
apartment. The wall between the dining room and the living
room was removed. The small porch off the kitchen was made
into a large deck, and insulation was blown into the walls
to create a year-round home. In the early 90's the deck was
removed because it was rotting. In 2001, the owners decided
to put an addition on the front of the house to expand and
upgrade the kitchen, and to replace the deck. They wanted more
light and space in the living/dining room. Since the kitchen
addition required removing part of the roof, they decided to
fulfill a secondary dream and raise the entire roof turning
the low attic into a full upstairs with two bedrooms and a
bath. The two existing bedrooms and the basement would remain
unchanged. |
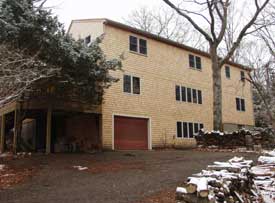
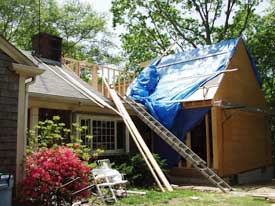
Circa 1975 (Back of House) |
After Renovation (Back of House) |
| Initial
inspection uncovered termite damage in the back requiring replacement
of the sill. Termite damage extended to the frame of the large
basement window. Since there was some water damage to second
floor large window from a former leaky roof, the homeowners
decided to replace that. Ultimately they decided on new windows
all around on the main floor, including double windows where
there had been single windows in both the dining room (over
the garage) and the back (master) bedroom, to increase light
inside. This additional work was in part cosmetic, but the
windows were old and, as the homeowners said, "we'll spend
less by doing it now, while you're here anyway." |
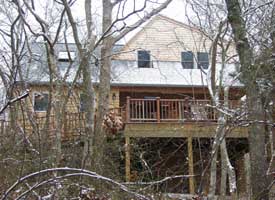
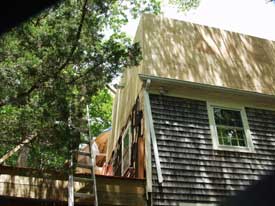
After Renovation (West Side) |
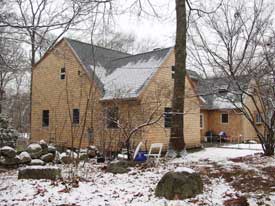
After Renovation (East Side) |
We
carried the new kitchen roof line all the way across the west
side over the deck to provide a six foot space on the deck
that is always shaded and protected from rain. The homeowners
wanted the ramp, rather than stairs, from the deck to the front
yard: easy access for large furniture, and trash removal via
wheelbarrow. Much to the homeowners surprise, the house is
visually interesting from all four sides.
The new shingles all around was an additional bit of work. The
new windows and the added second floor meant that there would
be shingling around the entire house. The old shingles were as
old as the house, and although in reasonable shape for a few
more years, it made sense to do the whole thing at once. Additionally,
this allowed us to remove the painted trim, replacing it with
shingles on the corners and with red cedar at the eaves. No more
trim painting. Maintenance costs will be lower. |
The Process
 |
In
December, 2001, the foundation was built. We capped it, including
a blue plastic tarp, for the winter. We did not want to remove
the roof during the winter. |
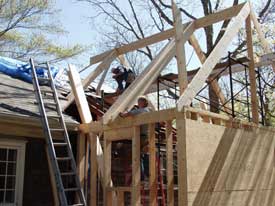
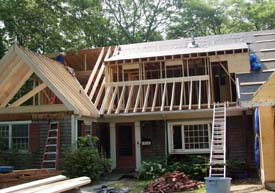
| In
the spring we put up the walls and roof of the kitchen before
removing the roof from the main part of the house. |
 |
 |
While
Marty and John framed in the kitchen, Dennis worked on the
deck. |
| Once
the kitchen addition was framed we began work on the upstairs
expansion. We removed the roof and built floor, walls, and
new roof in three stages so that the amount of area with no
roof was managable with tarps overnight. We were lucky with
the weather. There were only two rainy periods during the three
week period when there was only partial roof coverage. |
 |
 |
Once
we began putting up the walls, the back side of the house began
looking enormously tall. Architects plans called for leaving
the original roofline to break up the space. In consultation
with the homeowners, we removed the old roofline entirely,
using a diamond pattern in the shingles to create a visual
break. This removed a long expanse of expense in terms of flashing,
and provided a cleaner simpler line in keeping with the rest
of the house. |
 |
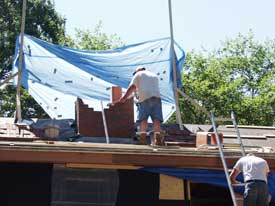
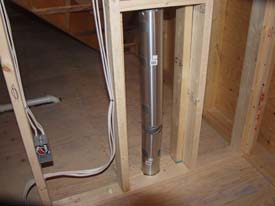
| Raising
the roof required extending the length of the chimney. Much
of this work occurred during the hottest part of July, which
is why the masons put up the blue tarp for a little relief
from the sun. |
 |
 |
The
gables on each side and the dormer in the middle provided some
tricky angles and juxtapositions when tying the rafters together.
We kept the third window in the dormer open, using it to bring
materials upstairs by ladder, until it was time to put the
shingles on. |
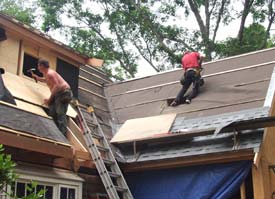
| Dennis
cuts the skylight opening in the kitchen while Tom finishes
the plywood roofing around the dormer. Completing the roof,
making it tight against rain and weather, was the first priority. |
 |
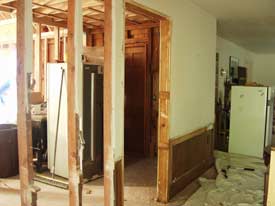 |
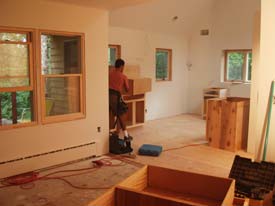
While
Dennis and Tom shingle the roof and put the siding up, Marty
removes the wall between the old dining room and kitchen. The
dining room will now extend into the old kitchen while the
kitchen moves out into the newly built section. Now that the
exterior is solid, the new kitchen becomes the highest priority. |
| Once
the roof was on and the kitchen opened up, plumbers and electricians "decended
en masse" to get in all the wiring and the water and heating
pipes while things were still wide open. They began work in
the kitchen area, then moved upstairs to the new bedrooms and
bathroom. |
 |
 |
While
plumbers and electricians worked upstairs, insulation and wallboard
were installed in the kitchen/dining room areas. |
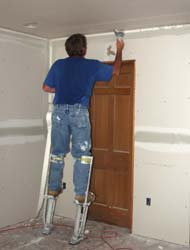
Richard "mudded" the
walls. Where it was hard to reach
he used stilts, which fascinated the owners. |
 |
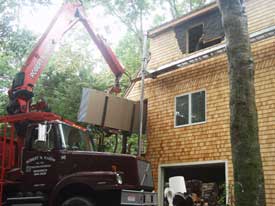 |
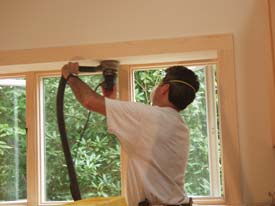
We
left one double window un-shingled so that the wallboard could
be hoisted into the second floor through the window. Here we
are opening up the window as the truck is hoisting the wallboard
up to us. |
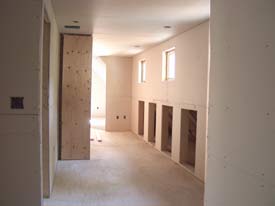
| Upstairs
begins to take shape. The hallway has storage cubbies along
the outside wall. The owners envision the grandchildren playing
in these small spaces when they're on the Cape, and storing
things like car seats and booster chairs, maybe life jackets
and snorkeling equipment, the children don't need to have in
California when they go home. |
 |
 |
Back
downstairs again, once the primer coat of paint was on the
walls, the kitchen cabinets were unpacked and installed. |
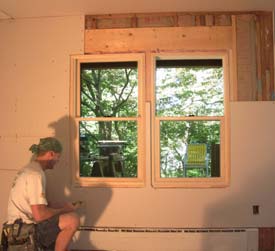
| Windows
were framed, sanded, stained and polyurethaned. The owners
wanted to keep the natural wood color, so the stain used was
very light, to keep the pine wood from yellowing, keeping it
in harmony with the light natural maple cabinets and butcherblock
counters. |
 |
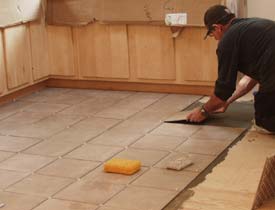 |
The
owners chose tile for the floor because it transfers heat best
from the radient heat used for the kitchen. They brought back
several tile samples and laid them out on the floor with a
sample of the maple of the cabinets and granite for the counter
under the sink. We were all asked for our opinions on the best
match. Much to the owners' surprise, the least expensive tile
won the contest. |
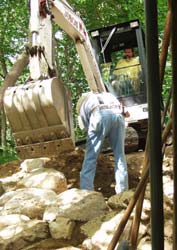
While
the interior of the house was taking shape, landscaping
was going on outside. The first job was to create rip rap
on the steep hillside on the west side of the house between
the edge of the deck and the front lawn. |
 |
 |
Once
the hillside had been stabilized Marty and Brian were able
to install the ramp connecting the deck with the front of the
house, and put up the deck railings. |
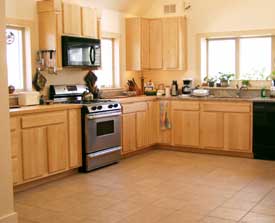
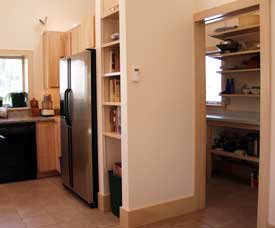
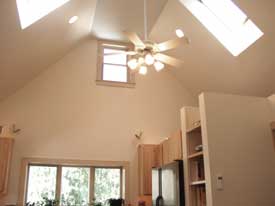 |
"The
finished kitchen is a joy to cook in and simply to be in," says
the owner. "Almost every woman who walks into it, and
some men as well say they simply want to stay right there.
Somehow it feels both cozy-comfortable and airy-spacious at
the same time." The warm color of the walls and cabinets
give the kitchen its cozy feeling, the high ceilings, windows
on two sides, and skylights give it the light airy spaciousness.
The butcherblock counter to the left of the stove had been in
the house where the owner grew up. She sanded it down and refinished
it, per our instructions. The rest of the counters, including
the granite under the picture window, was purchased new. The
pantry, visible through the doorway in the right hand photo,
is also the laundry room.
This kitchen was a true collaboration. The owners knew basically
what they wanted -- we knew how to make it happen. |
Return to Project Gallery
|